How to Switch Back to a Windows 10 Local User Account
Although it is highly unlikely there might be instances when you want to switch back to a local Windows 10 account from the Microsoft account that you have been using to log on to the operating system. The possible reasons include:
- You are planning to sell the PC out to an unknown person.
- You are planning to switch to a different Windows 10 computer and want all the settings and your personal information from the current PC to be removed.
- You no longer wish to use the Windows 10 operating system at all.
- You wish to use a different Microsoft account.
Regardless of the reason switching back to a local account from a registered Microsoft account in Windows 10 is a simple process that can be completed by following the steps given below:
- Sign-in to the Windows 10 PC using the Microsoft account.
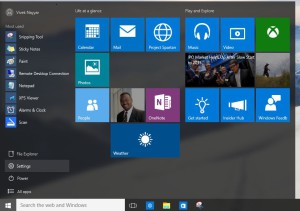
- From the desktop screen click the Start button from the bottom-left corner of the screen.
- From the displayed Start menu click Settings from the left pane.
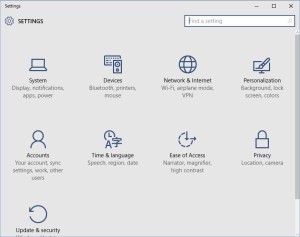
- From the opened Settings window click the Accounts category.
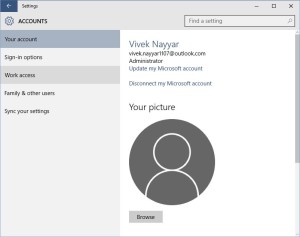
- Once on the Accounts window make sure that the Your account category is selected in the left pane.
- From the right pane click the Disconnect my Microsoft account link.
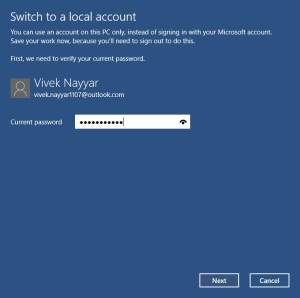
- On the Switch to a local account window in the available field provide the password for the currently signed in Microsoft user account.
- Click Next to continue.
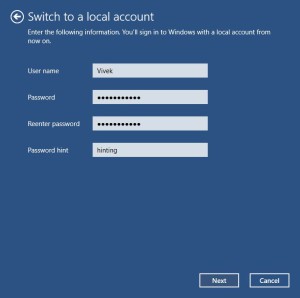
- On the next window populate the available fields with the username password and the password hint and click Next.
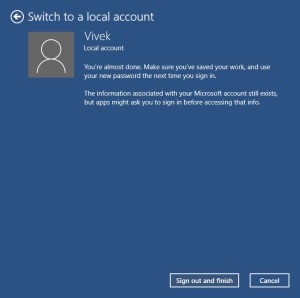
- On the final window click the Sign out and finish button.
- Wait until Windows 10 signs you out of the Microsoft account and logs you back in to the local account successfully.
