How to Run Older Applications in Windows 10
You cannot expect all the vendors to upgrade their programs to make them compatible with Windows and neither would you want to purchase all the applications every time a new version of Windows is out.
Nonetheless the fact still remains the same that not all applications are compatible with the latest operating systems and there are times when many applications do not initialize when you upgrade your PC to a newer version of Windows.
To make things easy for you Windows 10 allows you to run the programs in compatibility mode. Running a program in compatibility mode makes the application think that it is installed on an older compatible version of Windows thus the software runs without any flaws.
There are two ways you can run a program in compatibility mode:
- Program Compatibility Troubleshooter – This is a step-by-step wizard that allows you to pick a program that you prefer to use and configures it to run in compatibility mode.
- Compatibility Tab – This tab can be accessed from the properties box of the program that you wish to run in compatibility mode.
Running Program Compatibility Troubleshooter
- Sign in to your Windows 10 PC.
- From the desktop window right-click the Start button.
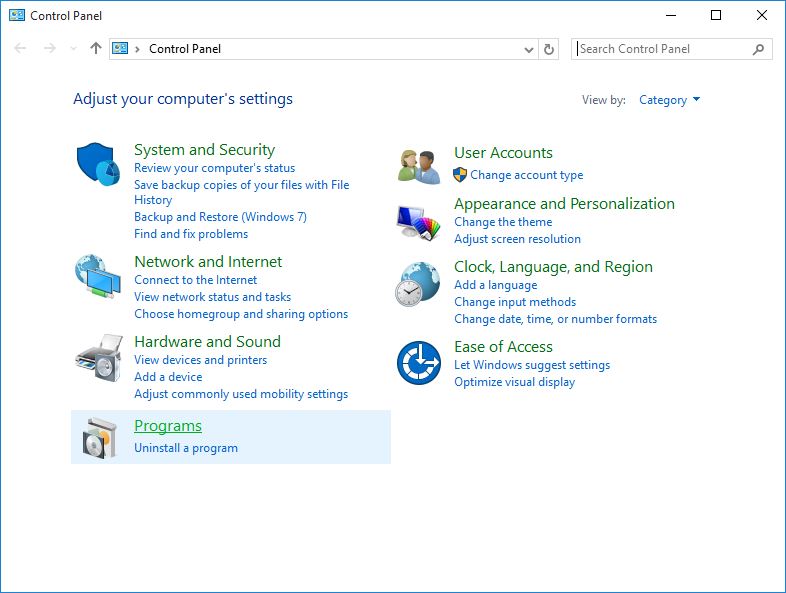
- From the context menu click Control Panel.
- Ensure that the View by type of the Control Panel is set to Category at the top-right corner.
- Click the Programs category.
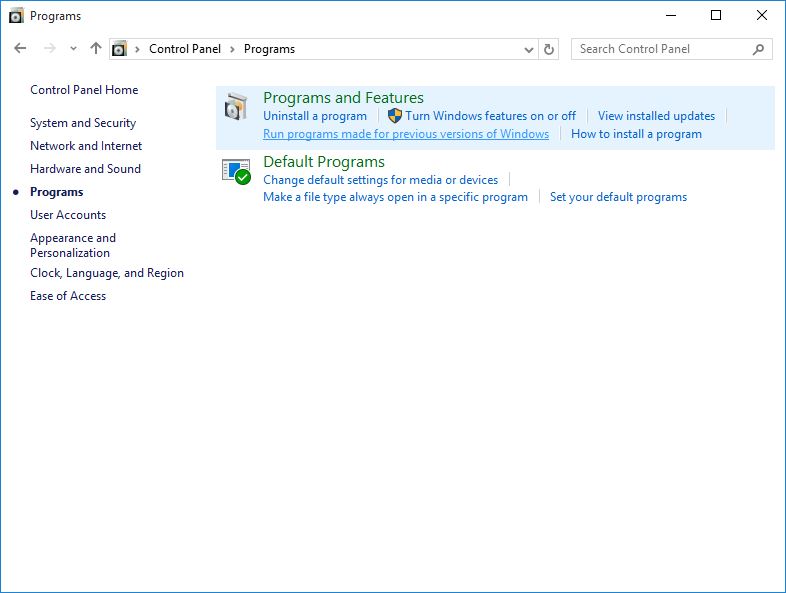
- From the right pane of the opened Programs window from under the Programs and Features section click Run programs made for previous versions of Windows.
- From the opened Program Compatibility Troubleshooter wizard click Next to continue.
- On the next screen from the displayed list of programs click to select the one that you wish to use in compatibility mode and click Next.
Note: You can select Not Listed and click Next to browse and locate your preferred program in case it is not present in the list.
- On the Select troubleshooting option screen click Try recommended settings.
- Wait until the settings are being applied on the selected program.
- Once done click the Test the program button to check if the program initializes properly.
- Click Next to continue.
- On the next window click the Yes save these settings for this program option if the program executed successfully.
Note: If the program couldn’t initialize when you clicked the Test the program button you can click the No try again using different settings option and follow the on-screen instructions from there. You may need to repeat this process multiple times until the program starts properly.
Accessing the Compatibility Tab
- On your Windows 10 computer right-click the short-cut icon of the program that you wish to run.
- From the context menu click Properties.
- Go to the Compatibility tab from the program’s properties box.
- From under the Compatibility mode section check the Run this program in compatibility mode for checkbox.
- From the enabled drop-down list choose the version of Windows on which the program used to run flawlessly.
Note: Depending on the Windows version you chose the other settings may get enabled or remain disabled. You may need to choose those settings accordingly.
- Optionally you can check the Run this program as an administrator checkbox as needed.
- Click OK when done.
- To execute the program in compatibility mode double-click its shortcut icon.
- If the program fails to run you can follow the above steps and choose a different version of Windows. You may need to repeat this process until the application initializes smoothly.

