How to Fix Slow Internet Speed in Windows 10
If you have been using Windows 10 for a while now and have accessed several websites it is likely that your browsing speed would become slow over time. Many times this happens because of the stale records in the DNS cache and the over-populated TEMP folder of your user profile.
In order to fix the reduced Internet browsing speed for your Windows 10 computer you can flush the DNS cache and empty the TEMP folder by following a few simple steps given below:
- Using an administrator account log on to your Windows 10 PC.
- Once on the desktop window right-click the Start button from the bottom-left corner.
- From the context menu that comes up click Command Prompt (Admin).
- When prompted click Yes in the User Account Control confirmation box.
- In the opened Administrator: Command Prompt window type the IPCONFIG /FLUSHDNS command and press Enter.
- After the command is executed successfully in the same window type EXIT and hit Enter.
- Once you are back on the desktop screen press the Windows + R keys together to open the Run command box.
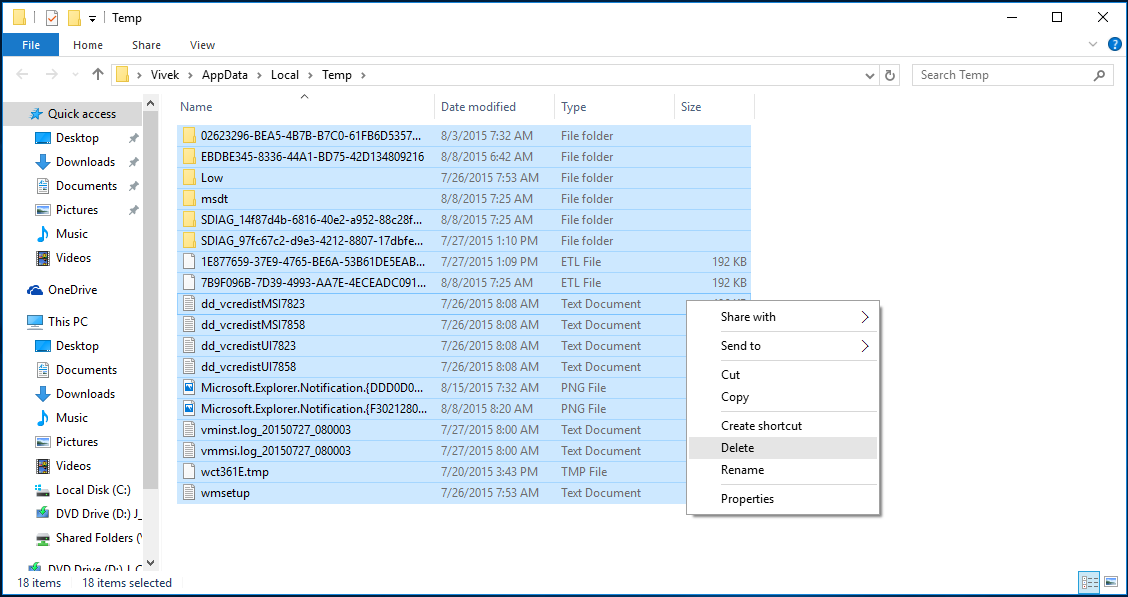
- In the available field type %TEMP% and press Enter.
- When inside the opened Temp folder press the Ctrl + A keys together to select all the displayed contents.
- Right-click any of the selected objects.
- From the context menu click Delete.
- Close the Temp folder.
- Back on the desktop screen click Start.
- Click Power from the Start menu.
- From the displayed options click Restart to restart the PC.
- Once restarted start using the increased browsing speed in your Windows 10 computer.


