How to Create or Delete a Partition in Windows 10
Creating a New Partition
Just like in previous versions of Windows Windows 10 also allows you to create volumes a.k.a. partitions of the hard disk drive from within the operating system itself.
While installing Windows 10 on a fresh computer it is recommended that you create only one partition and if you do not want to assign the entire hard disk space to the system partition during installation it is better to leave the remaining HDD space unallocated. This unallocated space can be assigned to other primary or logical partitions (within the extended partition) from within the Windows 10 GUI.
Assuming that you have created only one partition (system drive C:) during the time of Windows 10 installation as recommended to create other partitions in your hard disk drive from within Windows 10 you must follow the steps given below:
- Sign-in or log on to your Windows 10 PC with an account holding admin privileges.
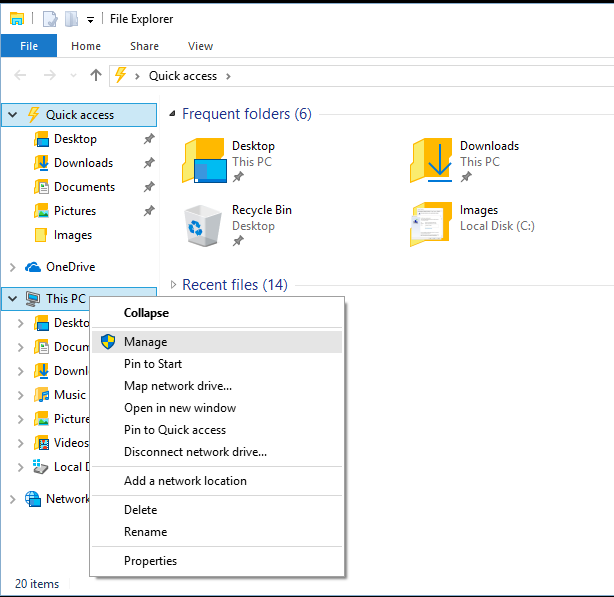
- Once on the desktop screen click the File Explorer icon from the taskbar.
- On the opened File Explorer window from the left pane right-click This PC.
- From the context menu click Manage.
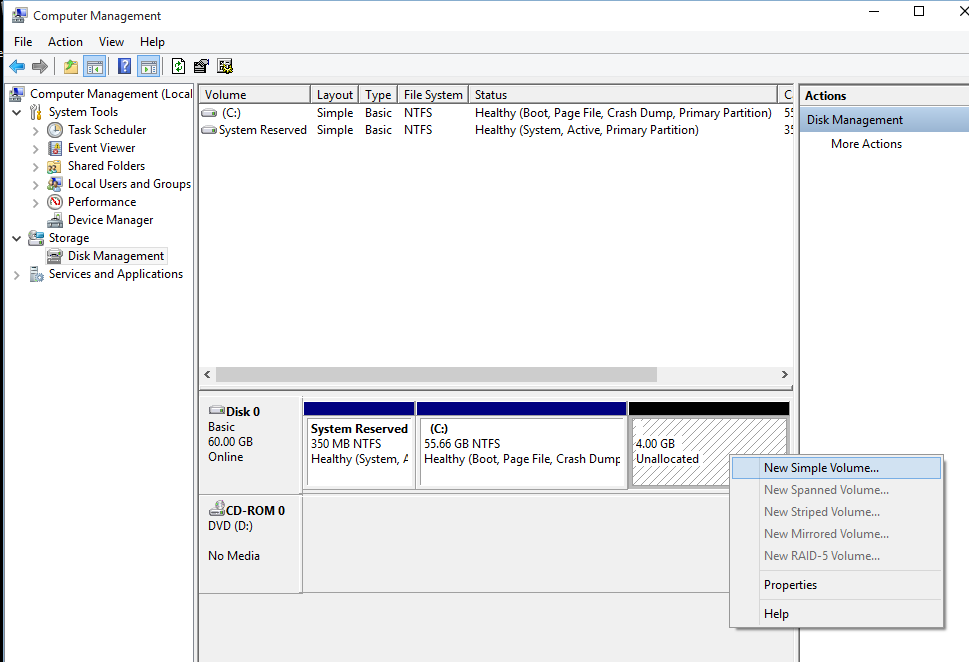
- On the opened Computer Management snap-in from the left pane click to select Disk Management from under the Storage category.
- From the right pane right-click anywhere within the Unallocated area indicated by the black border at its top.
- From the context menu click New Simple Volume.
- On the welcome page of the New Simple Volume Wizard box click Next.
- On the Specify Volume Size page in the available field type the amount of hard disk space that you want to assign to the partition you are about to create.
Note: The amount of space you want to assign should be given in megabytes (MB). E.g. to assign 4GB of disk space type 4096.
- Click Next to proceed to the next step.
- On the Assign Drive Letter or Path page leave everything as default for simplicity and click Next. Optionally you can also choose a different driver letter from the Assign the following drive letter drop-down list before clicking Next.
- On the Format Partition page leave all the settings intact to make the new partition ready and available right after its creation and click Next.
- On the Completing the New Simple Volume Wizard page click Finish to allow Windows 10 to create a new partition as per the provided specifications.
Deleting an Existing Partition
Removing an existing partition from a hard disk from within the Windows 10 GUI is comparatively simpler. However deleting the volume erases all the data that it contains and even some programs that have their mission-critical files saved in the volume may also stop working as well. Therefore it is recommended to backup all your data before deleting the partition.
To delete an existing partition from Windows 10:
- Follow the instructions from step 1 to 5 from the above section.
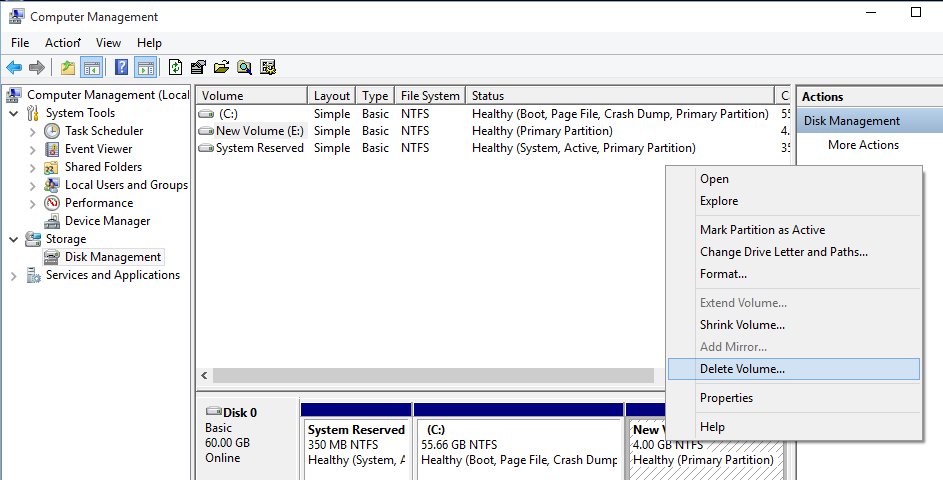
- From the right pane of the Disk Management section right-click the volume (partition) that you want to delete.
- From the context menu that appears click Delete Volume.
- On the Delete simple volume warning box click Yes to provide your consent to continue deleting the volume.
